I, and many other bloggers, are always going on about having an email list for your website – “…the money is in the list!” Whilst that is very true, I haven’t yet talked about what you should send out to your list nor how you go about creating it in AWeber. So for this post, I thought it would be good to do just that.
What Do I Send Out To My Email List?
Like I say, it’s important to build up an email list for your site, as those people who have subscribed are your best customers. They are the ones who are highly interested in what you have to say/sell to them as they chose to sign up. But what do you actually send out to these people to keep them subscribed to your list? After all, it’s pretty easy for them to unsubscribe if they are not happy.
Well, there are a number of different things that you can send out to your list. You could create and send an;
- eCourse
- Daily/Weekly/Monthly Newsletter
- Promotions and offers
- Exclusive content
- Downloads (PDFs, podcasts, videos, etc.)
- …or better yet, a combination of ALL of them!
The list is endless really. The point is that you are sending out interesting and helpful content to your subscribers that will (hopefully) tempt them back to your site.
Now I’m not going to get into the benefits of each type of content that you can send out in this post (though maybe in a future one), as for the most part it’s pretty self-explanatory. What I am going to do is show you how you go about creating these types of content in AWeber to send out, as they are all created in the same way.
Note: I will be talking about AWeber as that is what I use for my email list, though there will be a similar process for other email list providers that you may use.
Create A Newsletter In AWeber
I will show you how I create my weekly ‘OIT Newsletter’ that I send out (every Thursday) to my subscribers.
So, first things first, you need to log into your AWeber account. If you haven’t signed up for an account, you can do so here.
You will be taken to your AWeber ‘Home’ screen that gives you an ‘Account Overview’, showing things like; how many subscribers you have, how many subscribed today/yesterday and how many unsubscribed yesterday.
In order to create your Newsletter (or promotion, exclusive content, etc.) you need to click onto ‘Create A Broadcast’.
This will take you to the ‘Message Editor’ where you can create your broadcast. There are 3 stages to this process that we have to work though;
- Design
- Sharing
- Publish
1. Design
We will begin by adding a subject line, which will be what your subscribers will see in their email box before they actually open up the email. For this reason it needs to be something that makes them want to open up it up, not just simply ‘Newsletter’.
I tend to give a very brief summary of what the newsletter includes, though I will sometimes change this right before I publish until I am 100% happy.
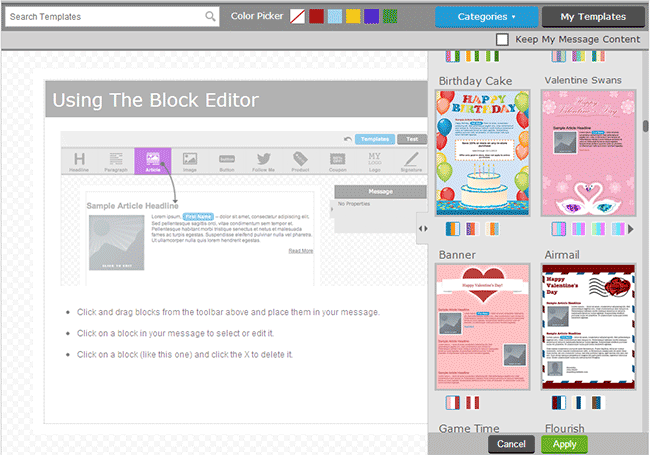
Now we get to do all the fun stuff and actually plan out the design of the Newsletter and figure out what we want to include in it. AWeber has tons of pre-made templates that you can choose from, whether you want to make a birthday themed email, an anniversary email, a corporate one, Christmas, etc. There will be something for you.
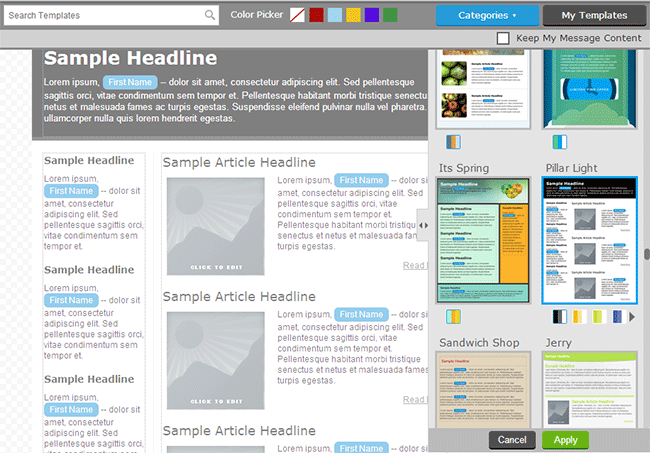
I would actually recommend using one of the pre-made templates, as it makes things much easier. Don’t worry whether it’s a themed template as you can remove all that, just find one that you like the layout of and pick that. I quite like the look of the ‘Pillar Light’ template as it has two columns that I can use, so I will select that one.
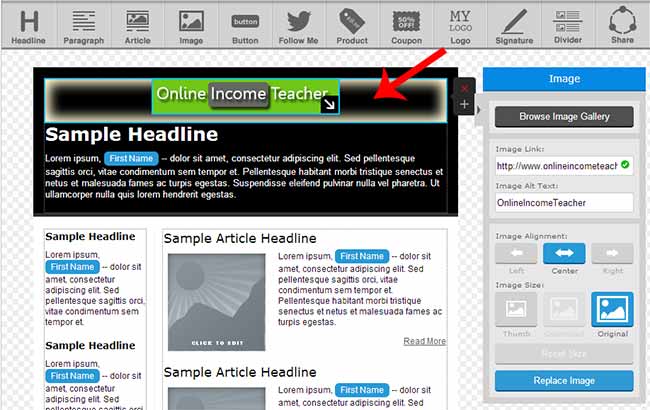
The great thing about AWeber’s Message Editor is that it is really easy to use. You can just drag and drop what you want to use and where you want to use it into your email design. At the top of your editor you will find a set of buttons that you can use. Simply drag those into your email where you want to add them.
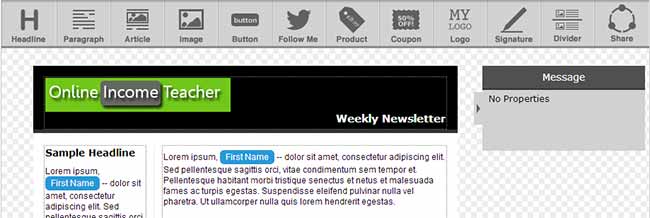
You’re more than likely to want to add your branding to your Newsletter, so we will do that first. Now, I want to add my logo to the Newsletter header, so I simply drag the ‘Logo’ button into my email and upload my logo image.
Now I don’t like all the text in the heading, so I will drag that to the main body of the email and use that as my introduction. I do however want to add a headline ‘Weekly Newsletter’.
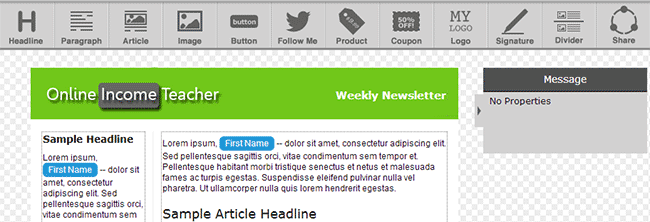
Whilst that looks OK, it would be better to get the text level with the logo. At the moment the text is slightly underneath the logo. To do this I need to create a ‘Vertical Split’, so that I can place them side by side. Simply click on the bit you want to split (so in this case the ‘Weekly Newsletter’ text) and click on the little icon that appears.
Lastly, I want to change the colour of the header from black to green to match my logo. For some reason, AWeber won’t let you do this manually (which is rather annoying), you have to get in touch with their help team who will edit it for you. Think it is to stop people abusing their templates, though it would have been nice to be able to pick a custom colour.
Still, I managed to get mine done by their team pretty easily.
Alternatively, you could just upload a large header image to add to the top of your Newsletter.
Now that we have the main branding done, we can look at the main body of the Newsletter.
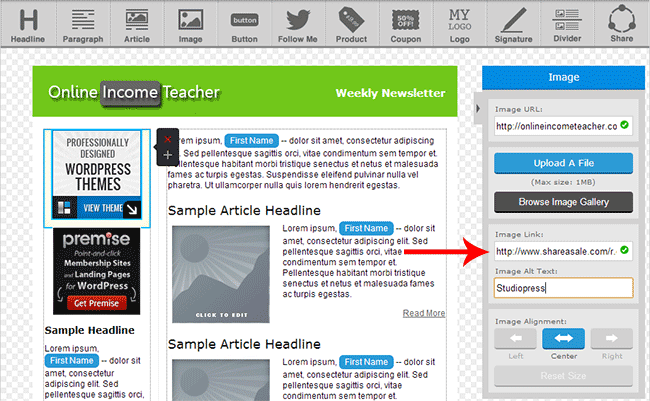
I personally like to add a couple of adverts in my Newsletter sidebar, as they can be quite effective at getting clicks from your subscribers. To do this I would simply add an image (by dragging the ‘Image’ button to where I want to add one) and uploading the advert image files. Then, all you have to do is make sure to include your affiliate/ad link that you want to send people too.
You don’t have to add ads, you could add images to your site, promotions, a link to your about page, etc. in exactly the same way.
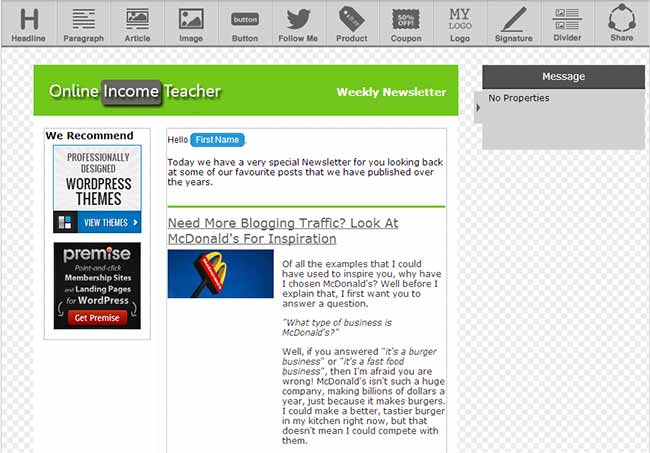
Now, to actually fill in the Newsletter itself. This is the easy bit as all you need to do is add your text and any images that you want to include. I like to add information about the posts that I have published on my site over the last week. That way, anyone who has missed any can easily catch up.
Alternatively, you could write an exclusive post just for your subscribers, tell them about your new product launch, inform them of any offers, etc.
For the purpose of this example, I will just add some of our best posts that you can check out (as this Newsletter won’t actually be sent out).
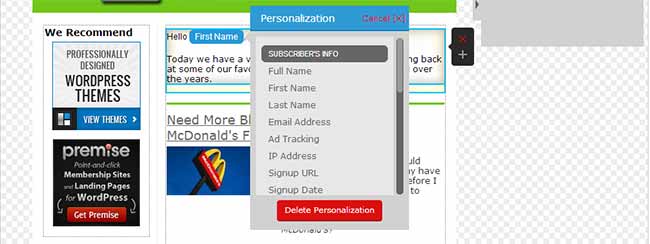
AWeber allows you to add personalised aspects to your Newsletter, such as the first name of whomever it is you are emailing. AWeber does this by looking at the name people entered when they signed up. This just makes the email seem a bit more personal than sending out a “Dear all…” generic email.
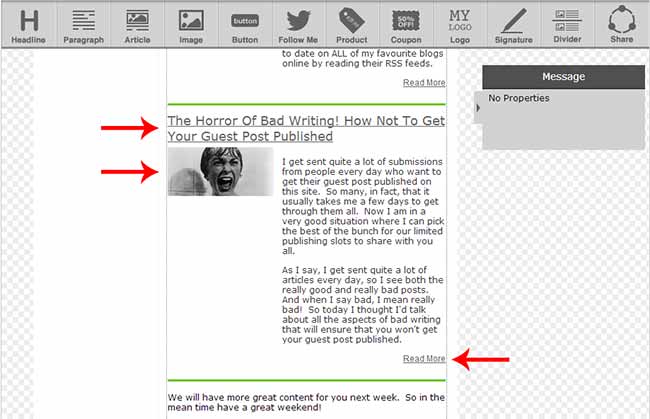
I have made sure to add a link to the post in question on the title, thumbnail image and ‘Read More’ link so that people can easily find the article. After all, you want to make it as easy as possible to get back to your site.
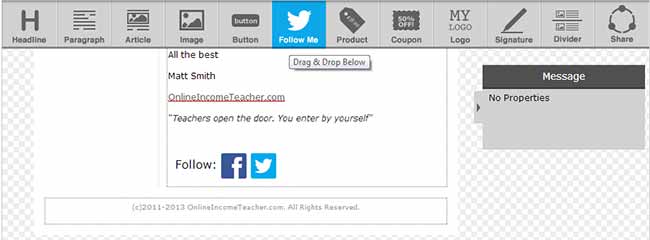
Lastly, you can add a ‘Subscribe’ section to your email, where people can click on and find you on Twitter and Facebook. Just remember to add your Facebook Page, not your personal account. Simply drag the ‘Follow Me’ button to where you want to display it.
Double and even triple check your newly created Newsletter and check for spelling mistakes and broken links. You can’t make changes once it has been sent out to your list, so make sure now.
That’s it!!! We are done with the email Newsletter. Now we can move onto step 2.
2. Sharing
This section is quite simple really. You can automatically Tweet out and post a link on your Facebook Page about your latest broadcast. This will include a link to your AWeber list homepage encouraging people to sign up.
Personally, I choose not to use this feature as I have an alternate signup page on my site that I prefer to send people too. I simply Tweet a link manually whenever my Newsletter gets sent out, but that is up to you.
3. Publish
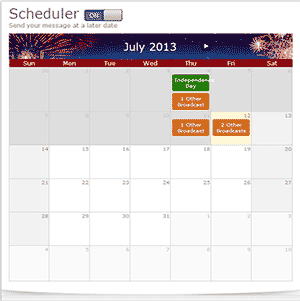
Finally, you can publish your Newsletter. There is a great feature that you can use where you can schedule your broadcasts to go out at a later date. This is great if you want to stockpile a few broadcasts to be sent out automatically. I like to use it to send out broadcasts at the best time of the day (ideally at 9am EST).
Last, but not least, you want to make sure that you have selected both the ‘Track clicks on website links in this message’ and ‘Email me when Quickstats are available’. This is just to help you monitor how well your broadcast goes down with your subscribers and help you improve it in the future.
Click ‘Save’ and on the next screen, hit ‘Send Now’. You have now sent out your Newsletter to your list! Woo!!
There are so many features to AWeber that you can play with to create really great broadcasts, no matter what they are. Hopefully you now feel more confident in creating your own to send out and tell the world about your great website.
Do you use AWeber for your email list? How do you find using it? Let us know your opinions in the comment section below!
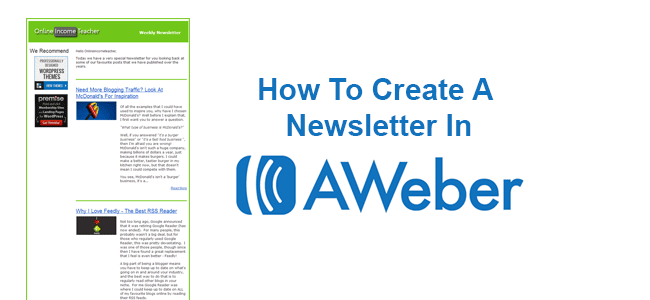
…oh! Nearly forgot, here is a copy of the Newsletter that I created. (it’s only an image though) To subscribe your self and get even more great content, go here!!!
Links in the newsletter;
- Need More Blogging Traffic? Look AT McDonald’s For Inspiration
- Why I Love Feedly – The Best RSS Reader
- The Horror Of Bad Writing! How Not To Get Your Guest Post Published






CommentLuv vs Disqus – Why I Don’t Use CommentLuv!