I’m sure that at some point you will have received an email from a company that uses a professional email address (e.g. name@example.com instead of nameexample@gamil.com), in fact you’ll probably have received hundreds of them. They are great for businesses as they appear a lot more professional. But how do you go about setting one up for your own site? Well in this post I will show you how, as well as how to open up all your emails in one inbox.
Why A Professional Email Address?
Well the key is in the name, it’s more “professional”. Imagine trying to contact a business, only to find that the email they use is a gmail, yahoo, outlook, etc. email. It just doesn’t give out the right impression. Those types of email addresses tend to be for personal use, anyone can set those up, which can, in some instances can look suspicious.
Imagine getting an email from your bank manager who used a personal email address (bankmanager@gmail.com, bankmanager @yahoo.com, bankmanager @hotmail.com, etc.). It doesn’t look very trustworthy and I certainly wouldn’t be emailing them back in a hurry. Now imagine getting one from a professional email address (bankmanager@examplebank.com). It looks a LOT more professional and trustworthy.
A professional email address can be setup for any business/website and will give you a lot more credibility in the eyes of the recipient. Not only that, but you can create a number of different professional email addresses for different purposes for your business (e.g. matt@example.com, admin@example.com, contact@example.com, etc.).
Create Your Email Address
For the purpose of this tutorial, I will assume that you already have your own website. If not, check out our ‘Learn How To Start A Blog’ guide. I will also be talking about HostGator, though there will be a similar process for whichever web hosting service you use.
1. Log into your cPanel
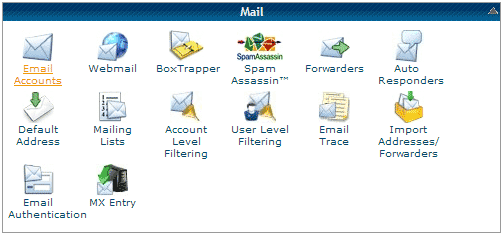
2. Scroll down the page to ‘Mail’ and click on ‘Email Accounts’
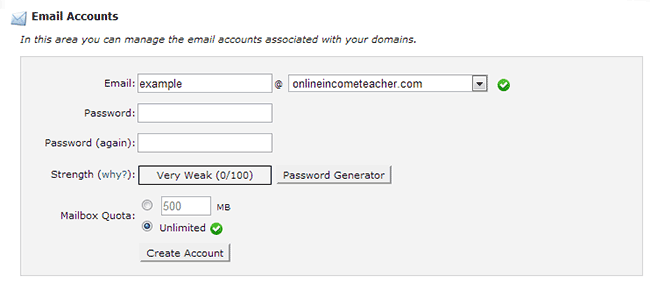
3. Here you will be able to create your new email address. Simply enter in what you want the email to be branded with (i.e. example) and pick the domain that you want to use (i.e. onlineincometeacher.com). Simply add a password and pick your mailbox quota (recommend going with ‘Unlimited’).
That’s it!!! You now have a brand new professional email address to use.
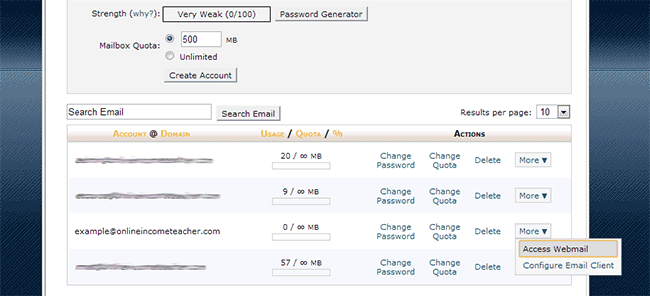
To check your new email account, scroll down the same page, click ‘More’ next to your new email address and then ‘Access Webmail’.
Set Up Your Email So That You Can Access It Via One Inbox
At the moment, if we want to access our new email address’s inbox, we have to log into cPanel every time and if you have more than 1 work email, that can be rather annoying. What’s worse is that you can’t easily access it via a mobile device, which can be quite frustrating if your business involves being on the go all day.
It would be much better if we could set it up so that we could access all our email accounts from one inbox. Thankfully you can do that and what’s better is that it is pretty simple to do.
I use Gmail for all my emails (personal and work), which is great as it allows me to access all my emails from one place. No need to log into separate accounts and check them manually, they are all there in one place. Plus, I can access them all with the Gmail app on my phone!
Whilst I will show you how to set this up via Gmail, you can do the exact same thing with Outlook.
1. Log into your Gmail account
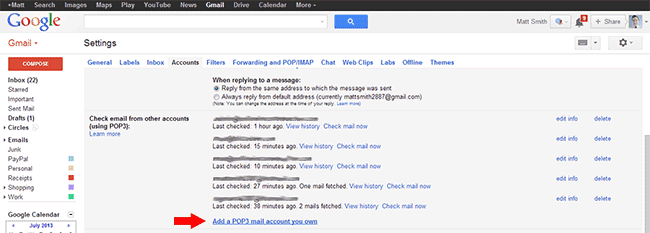
2. Go to ‘Settings’, ‘Accounts’, then scroll down and click on ‘Add a POP3 mail account you own’
3. This will open a new window where you can add your newly created email address. Click ‘Next’
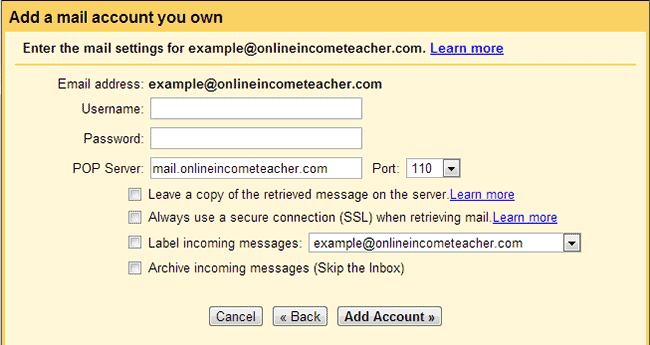
4. You will then be asked to enter in your mail setting. This is needed so that your emails will be delivered straight to your Gmail inbox. To find your mail settings we will need to go back to cPanel.
5. Log into cPanel
6. Go to ‘Mail’ > ‘Email Accounts’ (like before)
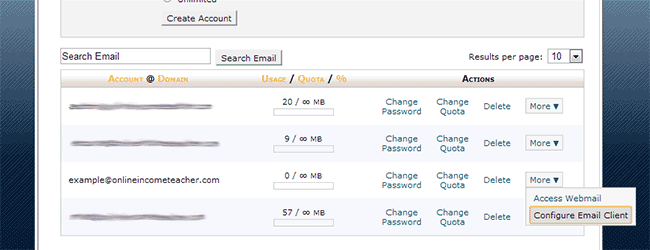
7. Scroll down to your email, click ‘More’ > ‘Configure Email Client’
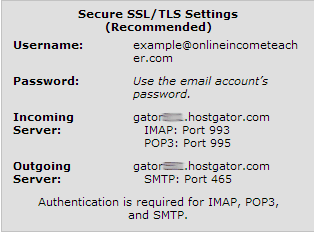
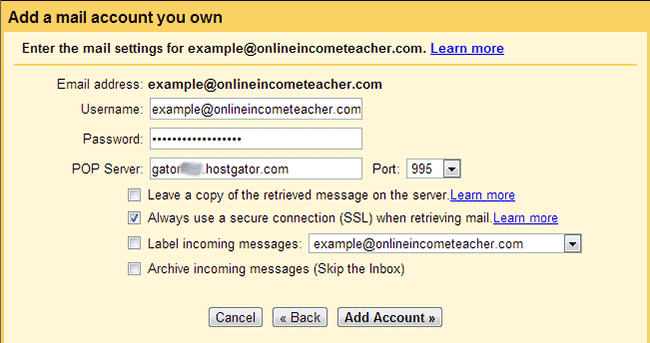
8. Enter in the details found here into your previous Gmail window. (There is also info on how to set up your email for Outlook, MacOS and Windows Live Mail here)
That’s it! You will now receive emails sent to your new professional email address in your Gmail inbox. Test it out by emailing yourself now.
Sending Emails From Your Gmail Inbox
Finally, we need to set it up so that we can actually send emails using our newly created email address from our Gmail inbox. As it stands, we are only able to receive them.
1. Log into Gmail
2. Go to ‘Settings’ > ‘Accounts’ (like before)
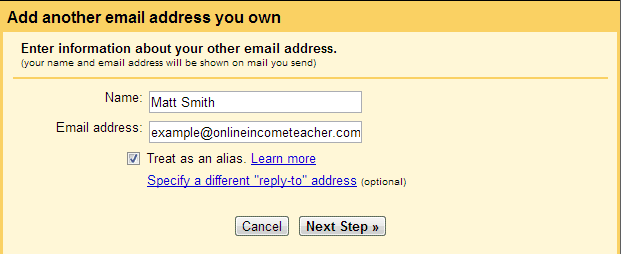
3. Find the ‘Send mail as:’ section and click on ‘Add another email address you own’
4. Enter in your details and click ‘Next’
5. You will then be asked to verify your email address. Google will send an email to your newly created email address which contains both a verification link and confirmation code. You can either enter in the code on the following screen or (like I did) just click the link. Better yet, as we have already set up Gmail to receive your emails, the verification email will be waiting for you in your inbox (if not just double check via cPanel).
That’s it! You can now send emails from your Gmail inbox using your new professional email address. Again, you can do the exact same thing in Outlook or Yahoo.
So, you now have a brand new professional email address for your business and you can send and receive emails from it via your Gmail inbox. If you want, you can add more email addresses in the exact same way (whether for business or personal), as Gmail allows you to add up to 5 additional email accounts. This makes life SO much easier as everything gets sent to one place.
Have you set up your professional email address for your business/website yet? Did you find it easy to add it to your main inbox? Please let us know by leaving a comment below!




CommentLuv vs Disqus – Why I Don’t Use CommentLuv!