In our previous post, we looked at setting up web hosting and installing WordPress so that you have a basic, blank canvas of a site online for you to work on. Now comes the fun bit where you can start to create your website. In the following post, we cover some of the basics and help you in getting started with WordPress. Let’s begin.
Getting Started With WordPress – A Blank Slate
Presuming that you followed our last post, you will have a brand new WordPress site installed on your web host. As it stands, the site isn’t much to look at the moment, but we will sort that out soon.
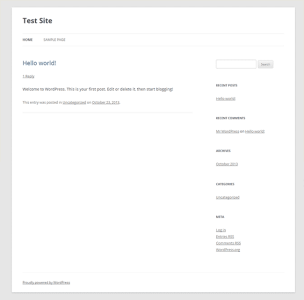
This is simply the basic framework that is installed with WordPress. We can instantly change the way it looks by changing the theme that we are using.
Log into your WordPress Dashboard by going to ‘[YOURDOMAINNAME]/wp-login.php’ and enter in your Username and Password that you entered when setting up WordPress.
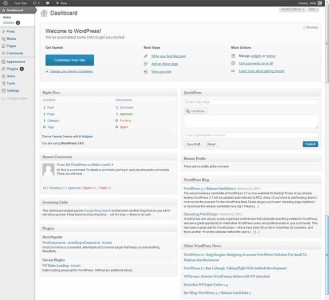
This is the back-end of your website where you will; add content, edit your site, setup menus, links, etc. You will spend most of your time in here, so it’s good to spend some time familiarising yourself with all the menus.
WordPress Themes
For now, we want to edit our WordPress theme. Go to ‘Appearance > Themes’ and you will see some that are already preloaded.
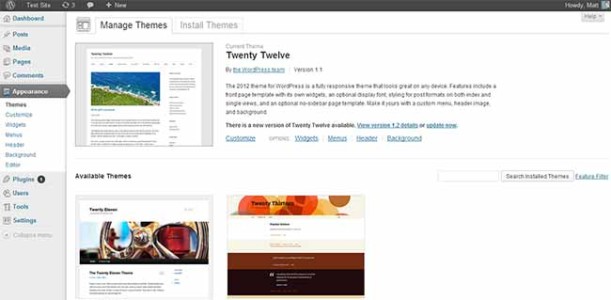
We currently have the Twenty Twelve theme loaded by default (you may have a different one depending on the latest version of WordPress that you install), but we can easily switch to one of the other ones. Simply click ‘Activate’ under the one that you want and then check your website again. We will go with the ‘Twenty Thirteen‘ theme for now.
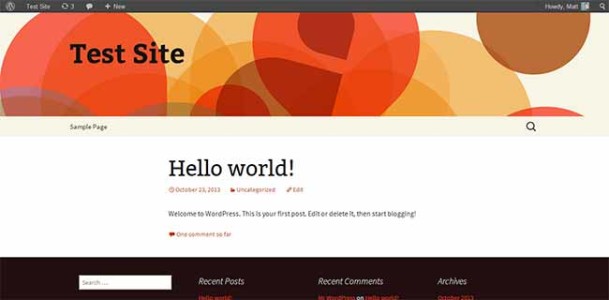
Well that looks much better already!
Changing your WordPress theme is a great way to transform the look of your website. What’s better is that it doesn’t affect any of the actual information that is on your site (posts, pages, images, etc.), it simply changes the way that it is displayed.
You can stick with these default WordPress themes if you wish, but there are a lot more available online to choose from. Go back to ‘Appearance > Themes’ and click on ‘Install Themes’ and you will be able to search though a whole host of free WordPress themes that you can use.
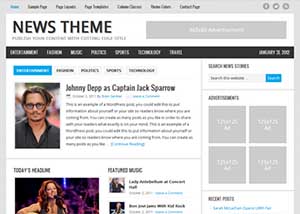
Alternatively, you can find much higher quality themes online. These themes tend to look a lot more professional and are updated regularly. I use StudioPress for all my themes and have installed the Genesis NewsTheme for OnlineIncomeTeacher (which I have customized). Read more about our website design and why we chose this them here.
For the purpose of this tutorial, I’ll stick with the ‘Twenty Thirteen’ default theme. Now that we have a nice looking site, we need to setup some WordPress plugins.
WordPress Plugins
As every site is different, it would be daft to include everything by default because most of it would never get used. This is where WordPress plugins come in. These are an easy way to add certain functionalities to your site when you need them.
At the time of writing this post, there are 27,548 plugins available that you can install to your site. This is one of the best things about WordPress, in that there are a lot of WordPress plugins to customize your site with to make it unique.
To save you the hassle of looking through all of them, here are a few posts with some useful plugins to consider.
- 15 Of The Best WordPress Plugins
- 10 Top Free WordPress Plugins
- 20 Great WordPress Plugins
- Top 10 Best WordPress Plugins
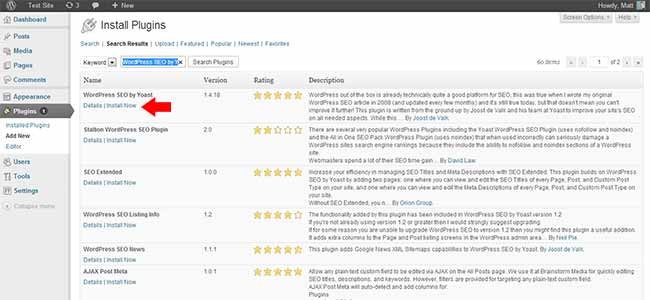
A particularly good one to install is the ‘WordPress SEO by Yoast’ plugin that will help you with SEO (search engine optimization). Let’s use that as an example to show you how to install one.
Go to ‘Plugins > Add New’ and search for the plugin that you want, which in this case is ‘WordPress SEO by Yoast’. This will give you a list of plugins that relate to the words that you entered, but for us, we just want to install the top one (which is the one we are looking for).
Click ‘Install Now’ and then ‘Activate Plugin’ when prompted.
That’s it! You have your first plugin installed. Simply do the same for the other plugins that you want and they will be added to your site. Just note that you may have to setup some plugins, in which case there will be information on the plugin website.
Adding Your First Post/Page
Now, we need to add some content. WordPress splits up the two types of content into posts and pages.
- Posts are for your blog. Any information that you want to add on a regular basis will be added here, which will be accessible via your blog feed.
- Pages are more for static content. These will be pages that will contain your main information (e.g. contact page, product pages, about page, etc.) that won’t be updated regularly. Here are some useful pages that every site needs to get you started.
Despite them being separated like this, you use the exact same method to set one up and publish on your site. It’s just a way to keep the two separate so that it is easier to access. You’ll probably be creating many more posts than pages for your site, so let’s show you how to set one up.
Go to ‘Posts > Add New’ and you will be taken to a blank post page.
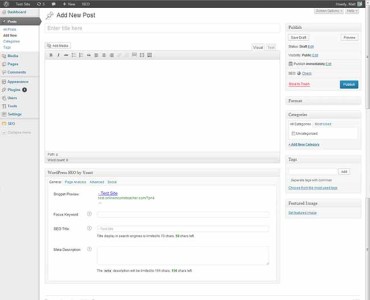
Here you will add all your content that you want to be displayed. It’s fairly straight forward (add your title and text in the boxes provided), but there are a few features that you will want to look at.
Quick Note – The ‘WordPress SEO by Yoast’ box is only displayed because I installed it earlier. You won’t see this if you didn’t install it. Alternatively, you may see other boxes depending on the theme/plugins that you have installed.
Categories
Here you can include your post to a certain category (or set one up). This is a great way to organize your posts on your site. For example, I have a number of categories that I use, including; content, money, traffic, social media, etc. This just helps people to find posts that are related to each other. You can add a post to as many categories as you want.
Tags
These are like mini categories. You can add in important words/phrases that relate to your post. For example, this tutorial would have tags like; WordPress, tutorial, WordPress plugins, etc. You can add as many tags as you want to your posts, which helps people to find related posts.
Featured Image
Here you can add an image that will be displayed next to your post on your blog page, category page, home page, etc. The advantage of this is that you don’t have to include the image in your actual post if you don’t want.
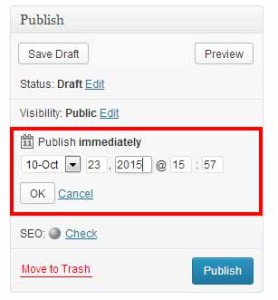
Schedule Your Post
When you have your post ready, you can hit ‘Publish’ to instantly publish it on your site. However, if you wanted to publish it at a later date, perhaps the day after or next week, you can schedule it to do so.
Simply click on ‘Edit’ next to ‘Publish immediately’ and you will be able to enter in a date and time when you want to publish it. In fact you can do this with a number of posts, so you can setup a whole series of posts to be published to your visitors when you want.
Don’t worry about making mistakes on your posts, you can always come back and edit them at a later date. Publishing them simply means that they are live on your site; they are not set in stone. Edit them as many times as you want.
Check out our post on how to plan out and write your first blog post.
For the purpose of this tutorial I will publish a very basic example to show you.

Setting Up Your Menus
So we have our first post setup, what about our menus. Menus are vitally important for your website as they help visitors to navigate around your site. Let’s look at how to setup your first menu.
Go to ‘Appearance > Menus’ and you will be able to create multiple menus. Name your menu (i.e. Category Menu) and hit ‘Create Menu’. Now you can add any links, posts, pages, tags, categories that you want.
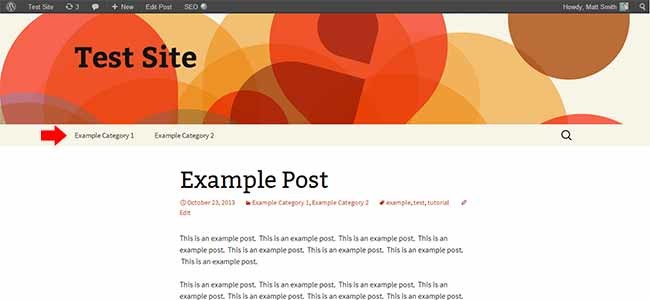
I want to create one that displays my categories so people can find the relevant posts, so I simply add the categories, from the category options, to the menu and hit ‘Save Menu’.
The last thing we need to do is place the menu where we want it to go. Click on the ‘Manage Locations’ tab and assign your newly created menu to the ‘Navigation Menu’ and hit ‘Save Changes’. If we check our site, we will see that the menu has been placed under our header.
Quick Note – Some WordPress templates will have more than one place that you can assign a menu.
Adding Widgets
The last main feature that we need to look at is widgets. Widgets are small features that you can add to your site that offer different functionality. Whilst there are some default widgets that come pre-packaged with WordPress, there are thousands of different ones that you can download from the WordPress site (see WordPress Plugins).
Now, there are different areas of your site that you can add plugins. If we take a look at our default WordPress site, we can see where we can add them.

Consisting of a sidebar and footer area, this is the default layout for widgets that you will see on many sites. That said, you can sometimes change the position of the widget areas depending on the theme that you are using. This is something to think about when picking a WordPress theme for your site.
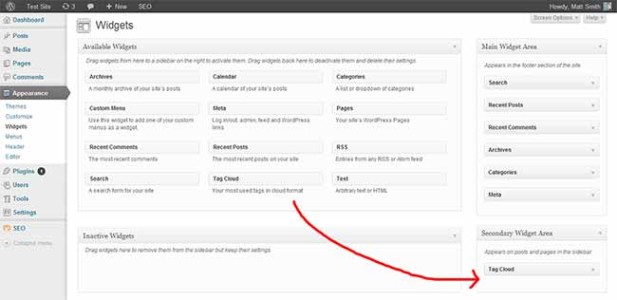
To actually add a widget to your site, go to ‘Appearance > Widgets’ and you will be able to edit everything here. Here you can see your ‘Available Widgets’ and (in our case) ‘Main Widget Area’ & ‘Secondary Widget Area’. All you do is simply drag the widget that you want to the desired area.
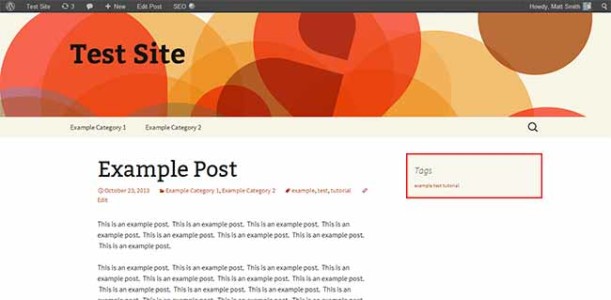
Currently we haven’t got anything in our sidebar, so I’ll add a ‘Tag Cloud’ widget to our site.
Now if we check our site, we will see that it has been added to our sidebar.
This is just a simple example, but hopefully it just shows how easy it is to add widgets to your site. You’ll likely want to add; social media buttons, adverts, email subscribe box, top posts, etc. to your sidebar to make it more engaging to your visitors.
Now Go Create Your WordPress Website!
We have now covered the basics of WordPress to help get you started. There is much more that you can learn about and use, but you should now be able to get your site up and running.
WordPress is a fantastic content management system (CMS) for you to use for your site as it makes it really easy to managed and edit without needing to know any coding. That is why SO MANY people are using it to manage their sites online.
Hopefully you found this tutorial helpful. If you have any further questions or need some advice with your own site, feel free to leave a comment below and I’ll get back to you.
CommentLuv vs Disqus – Why I Don’t Use CommentLuv!