Since you should have now registered your domain name, you are now ready to move onto the next step of setting up your site by finding web hosting.
For any site to be accessible online, you need to have a place to store all your website information (e.g. images, script, CSS, HTML, etc.) This is where web hosting comes in. This is the physical space where your website will be stored for people to access 24hrs a day. You won’t be able to get your site up and running until you set this up, so it’s a pretty vital step to take.
HostGator Web Hosting
I would always recommend going with HostGator for your web hosting as that is the one that I and many others use to host their website with. Not only is it very easy to transfer over your newly bought domain name, but HostGator makes it really easy to install and setup WordPress for your site straight away. In fact there are a number of different scripts that you can install when you are setting up your site, whether for a blog, eCommerce site, forum, etc. including; Drupal, Joomla, phpBB, Zen Cart, 4Images Gallery, and many other more. In most circumstances though, you’ll be fine with WordPress.
Picking The Right Web Hosting Package
There are 3 different web hosting plans for you to choose from on HostGator.
- Hatchling Plan
- Baby Plan
- Business Plan
Each is aimed at how many sites you want to setup.
So if you are just starting out and only have plans for running a single site, then the Hatchling Plan would be the perfect bet for you. If on the other hand you plan to create a number of different sites, then you’d be better off going for the Baby Plan or Business Plan (you get additional features with the Business Plan as well).
Simply pick the one that best suits you. You can always upgrade your plan at a later date as well.
Linking Your Domain Name & Web Hosting Together
If you’ve been following our tutorials, you should already have your own domain name with GoDaddy and now be ready to setup your hosting with HostGator.
The reason why I recommend getting them separately is that it gives you more freedom in the future. Should you want to change web hosting provider for some reason or perhaps sell your site to someone, it makes it much easier if your domain and hosting are registered separately. Purchase them together with the same company and you will find it much more difficult to do this.
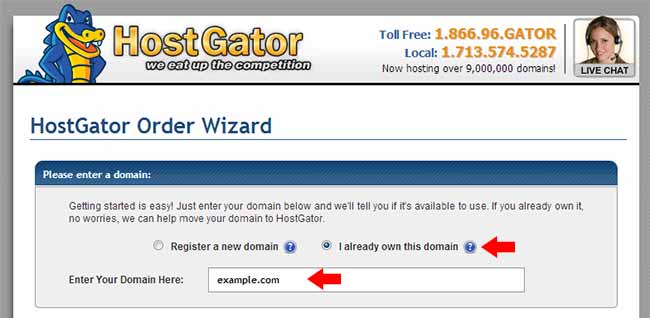
When you pick your web hosting plan, you will be allowed to enter in your existing domain. Simply click on the ‘I already own this domain’.
Simply follow all the on-screen instructions and enter your payment details to purchase your web hosting. Congratulations! You now have your web hosting setup.
Whilst we stated that we already had a domain name, we still need to physically link it to your web hosting account that you have just bought. As it stands at the moment, they aren’t joined at all.
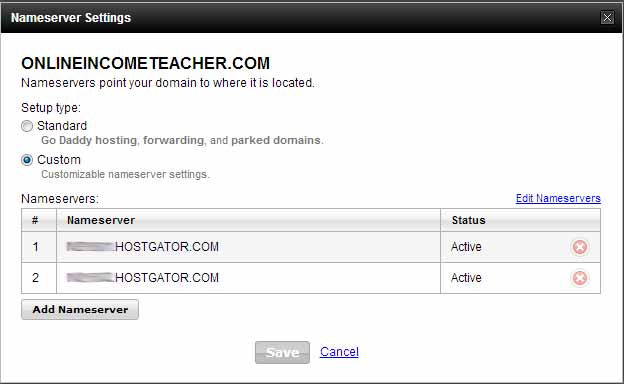
You should receive a confirmation email through from HostGator that includes two codes that you need to add to your GoDaddy account. Simply log into your GoDaddy Account and navigate to your ‘My Account’ page. From here, go to Domains > Launch (next to the domain that you want to link) > Nameservers ‘Manage’ > Edit Nameservers and change the information to the ones you got in your HostGator email.
Once you have changed these, you will receive another confirmation email (may take a few minutes, so be patient). As soon as you have this, your domain name and web hosting will be linked together.
Setting Up WordPress
The last thing for us to do is to setup your basic site with WordPress.
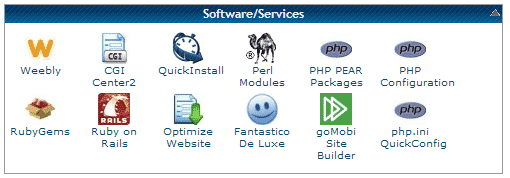
Log into your HostGator cPanel and scroll down till you find the ‘Fantastico De Luxe’ option.
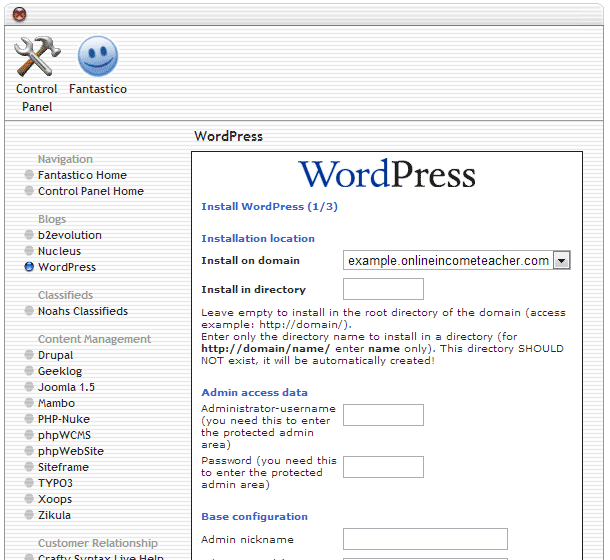
Here you will be able to select a number of different scripts that you can install, though you’ll only ever really need WordPress. Simply follow the on-screen instructions and make sure that you install it to the right domain (should you have more than one setup).
You will now have a basic WordPress site setup on your domain name that you will be able to go in and edit to your heart’s content. We will cover more about that in our next post.
Did you follow this tutorial to setup your website? If so, how did you find it? Do you use a different web hosting provider than HostGator? Please get in touch below and let us know.

CommentLuv vs Disqus – Why I Don’t Use CommentLuv!