A big part of running a website involves keeping tabs on what your site looks like in the search engines. After all, that is how the vast majority of people will find your site, so it pays to make sure that your website is displaying correctly. Whilst checking my own site, I noticed something that people seem to be forgetting to do. People are failing to setup Google Authorship when guest blogging!
What’s Going On?
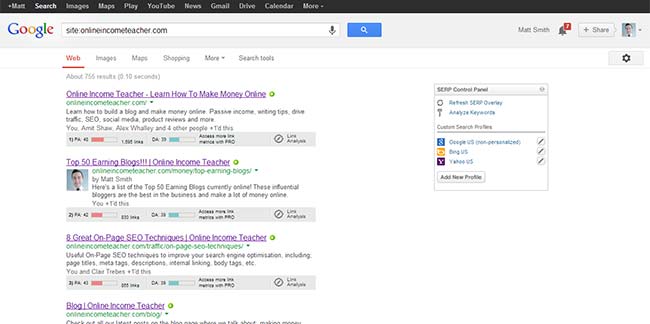
So when you check your website on Google, you can see all the posts and pages that they have indexed from your site.
Quick Tip: To check your site on Google, enter in ‘site:example.com’ (replace example.com with your website URL) and you will see all the posts and pages from just your site.
The little grey box under each listing is displaying because I have the MozBar Chrome extension running. This is great for seeing more information about SERP listings, though we talk more about that in our ‘Beginners Guide to Domain Authority’ post.
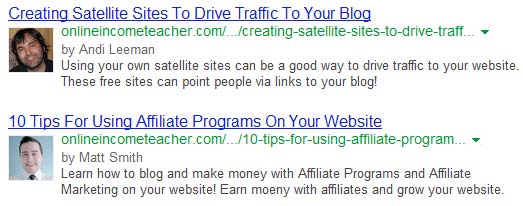
Anyway, as you can see, my ugly mug is showing up in the search results as I have setup Google Authority correctly for my site. That means that whenever one of my posts that “I” have written shows up in the SERPs, my face will appear next to it, which links to my Google+ page.
Notice that I said “I”, because posts that have been published on Online Income Teacher by “other” people will have their own image appear. This is because I have setup Google Authorship for them as well.
Quick Note: Google tends to only show one author picture per SERP page for each individual writer. So when you do a ‘site:example.com’ search, don’t be alarmed to see that your picture isn’t next to all your posts. Simply doing a separate search for the post in question will reveal that you do in fact have your image appearing (at least if you have setup Authorship correctly!).
That is all great, HOWEVER not all guest writers setup Google Authorship correctly, so there are many writers that don’t get their photo shown. You see in order to setup Google Authorship correctly; you need to add a link back to the website that you have written for on your own Google+ page. The website owner can only do their job by adding your G+ link (and markup) to your post, you have to do the rest!
I’d say that only about 10% of guest writers that have written for my site have setup Google Authorship correctly as most of them aren’t showing up in the SERPs. I’m sure that is simply because they have just forgotten, which is why I thought it would be good to write this post.
Why It Is Important To Get Your Face In Google SERPs
When Google first announced that they were going to roll out Authorship and display an image next to search results, I didn’t quite get it. In fact there are still plenty of people who don’t see the point of it, however after setting it up and using it myself, there are 2 big benefits as to why you should!
- Get recognised
- Get more traffic
Get Recognised
If you write regularly (be it on your own website and/or other people’s sites) the number of posts online that you’ve written begins to add up. Therefore, the more of your posts that are published, the more frequently your image will show up in the SERPs.
People will see that and begin to recognise you as someone that (hopefully) knows what they are talking about, which leads to…
Get More Traffic
As people start recognising you, they are more likely to click onto one of your posts in the SERPs. This helps drive more traffic (to your site or guest site) as they want to read what you have to say.
Also, it has been shown that having a picture next to a search result improves click-through rate. Seemingly, people trust a post more when they can see who it has been written by, instead of the faceless authors of other posts.
So, it does make sense to setup Google Authorship. You just need to make sure you do it properly!
How To Setup Google Authorship
Now this post isn’t about setting up Google Authorship on your own website, as I have already written a Google Authorship Guide. Instead, I want to talk about making sure to setup Authorship correctly when writing for another site.
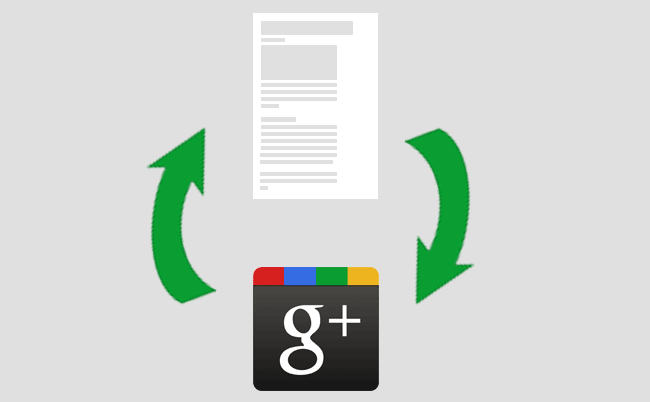
There are basically two things that you need to do to set it up properly.
- Link from your post to your G+ profile
- Link back from your G+ profile to the website you have written on.
Whilst a lot of people are doing step 1, many are forgetting about step 2. You need both in order for it to work!
Step 1: Link From Your Post To Your G+ Profile
Somewhere in your post (usually your bio section) you want to add a link to your Google+ profile. All you need to do is add a link with the right markup.
For example – https://plus.google.com/106528121033852984589? rel=author
Hover over my ‘Google+’ link in my bio at the end of this post to see how I have set it up.
Step 2: Link From Your G+ Profile To The Website
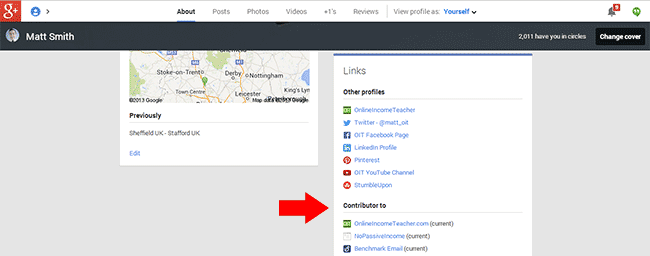
Go to your Google+ profile (your personal profile, not a G+ page) and open up your ‘About’ page. Here, there is a ‘Links’ section, with a ‘Contributor to’ that you can add to. You want to add the website that you have written for here in order for Authorship to be setup properly.
It is pretty easy to forget about, but it’s something that you must remember to add!!!
Have you had problems setting up your Google Authorship? Have you had problems getting it to work when writing for other sites? Please let us know in the comments section below!

CommentLuv vs Disqus – Why I Don’t Use CommentLuv!