
Never before has it been easier for you to setup your own website online. So much so, in fact, that it is incredibly quick to do so, meaning that you shouldn’t have the excuse of “I haven’t got enough time to setup a website” as it can be done easily in under 15 minutes!
This post will guide you through the process to setup a website and get it online for you to grow, be it a business website, a personal website or something in-between. So without further ado, let’s get started… the clock is ticking after all.
Register A Domain Name
First thing you need to sort out is a Domain name. This is essentially the address of your site (e.g. www.domainname.com) and every site needs one in order to be found online.
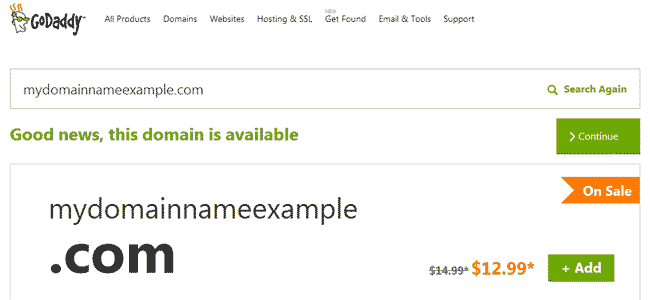
Now there are many sites online where you can buy a domain name from, such as; GoDaddy.com, Register.com, 123-reg.co.uk, 1and1.com, etc. but all function in exactly the same way. For the purpose of this example, I’ll be using GoDaddy as that’s the site I use when registering all my domain names.
Simply enter in the domain name that you want to use (i.e. MyDomainNameExample) and the site will let you know if it is already in use. You may find that certain domain extensions are already in use, but others (i.e. .co.uk, .net, .biz, etc.) are still available. Try if you can to get the .com version as that is the one most people will enter automatically.
When you are happy with the name you have chosen, follow the onscreen instructions to purchase your domain. This will simply involve entering your details, payment and most importantly choosing how long you want to register it for. I’d probably recommend registering for 12 months to start with and then after that time has passed, re-registering for a few years in advance. That way, you know that your domain name is yours for the foreseeable future.
Here are a couple of posts to help you choose a good domain name that you can read;
Setup Web Hosting
Next up, we need to purchase space online for all your website files to be stored. This is called ‘Hosting’ as it is where these files are “hosted” for people to find 24hrs a day, 7 days a week.
Again, there are many places online where you can purchase Hosting from, such as; HostGator.com, DreamHost.com, 1and1.com, etc. but all generally work in the same way. I’ll be using HostGator as an example as that is the one I use to host all my sites on.

All you have to do is choose the right package that you want to go for. HostGator gives you the option of going with the;
- Hatchling Plan – Single site domains
- Baby Plan – Unlimited domains
- Business Plan – Unlimited domains with added features
As you are reading this guide, this is probably your first website so you are better off going for the Hatchling Plan to start with. If you want to create further sites in the future, you can always upgrade to the Baby/Business plan later.
Follow the onscreen instructions to purchase your hosting package. You will be asked to enter in your existing domain name (that we have just registered previously) before you make your final payment. You are now the owner of hosting space for your site.
The last thing you need to do is link your domain and hosting together so that when you type in your domain, you get directed to your hosting space and any files that are stored there. To do this, follow our simple ‘Linking Your Domain Name & Web Hosting Together’ guide.
Install WordPress

We have your domain and hosting all sorted out, now we need a way to help you create your site. Years ago, you needed to be able to manually code a site to get it up online, but nowadays there are great content management systems (CMS) that you can use to make the job a whole lot easier.
WordPress is the Godfather of CMS and is used by millions of sites around the word (including this very site). What makes it so popular is that it is incredibly easy to use and, more importantly, allows you to create professional, custom sites to your liking.
If you went with HostGator, you can follow our guide to install WordPress for your site here that only takes a minute or two – ‘Setting Up WordPress’. Don’t worry if you went with another hosting provider though as many use the same method as shown.
With that, you now have your very own website up and running. Congratulations! That didn’t take that long now did it.
Hurray, Your Online!!! …Now What?
Once you have WordPress installed, the fun really begins as you can start to play around with the way it looks and, of course, add all your content.
Check out our ‘Getting Started With WordPress – Beginners Guide’ to help you find your way around your brand new site. Here we show you how to add new pages, posts, install plugins, menus and much more.
Also, check out our ‘Genesis Framework Review’ as we explain why we chose to purchase one of their premium themes to really make our website stand out from the crowd.
Are you starting a new website? Do you have any questions that you need answering? We are here to help you, so let us know what you need help with in the comment section below and we will try to answer it for you.
CommentLuv vs Disqus – Why I Don’t Use CommentLuv!